Snort is a packet sniffer which uses the WinPcap library for sniffing network traffic. What makes Snort stand out is its ability to be configured to detect and log many different traffic patterns. This tutorial will be based on the Windows version of Snort, since it’s the basics, but for more advanced stuff, I recommend running Snort in a nix-based system.
1. Download and install Snort and WinPcap
2. Open up a command prompt and navigate to the install folder C:\Snort\bin
3. To determine which network interface to use, type Snort –W
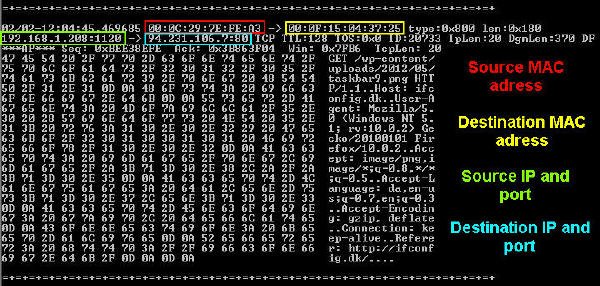
To capture some traffic we will be using the arguments -d -e and -v meaning that Snort output will show the IP (Layer3), TCP/UDP/ICMP (Layer4) headers, and the packets data (Layer7). The –i 2 argument specifies packet capture on the 2nd network interface.
4. Type snort -dev -i 2
5. Generate some network traffic
6. Abort the capture by pressing Ctrl+C
You will now see the captured traffic.

Snort can also log the traffic and write it to a file on the disk. This is done with the -l argument. Using the -K ascii argument will tell Snort to write the info in ascii format.
7. Type snort -dev -i 2 -l C:\Snort\log -K ascii
8. Generate some network traffic
9. Abort the capture by pressing Ctrl+C
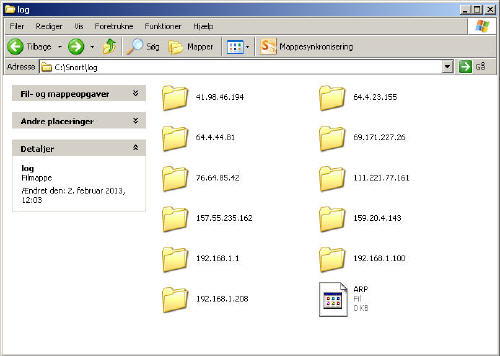
Now go the C:\Snort\log folder, you should see that the logged packets arranged by destination IP.
Snort can also be used as an Intrusion Detection System (IDS), which means that it only picks up packets which match certain rules. The Snort rules are set up in this order:
[ACTION] [PROTOCOL] [ADDRESS] [PORT] [DIRECTION] [ADDRESS] [PORT]
Where [ACTION] defines what action Snort is to take when encountering a packet that fits the criteria. [PROTOCOL] defines what protocol the packets would have to be using. After that [ADDRESS] is the source address (IP address) of the packet and the [PORT] defines the source port. [DIRECTION] Tells which way the packet should be going and once again [ADDRESS] [PORT] tell the address and port where the packet is going to.
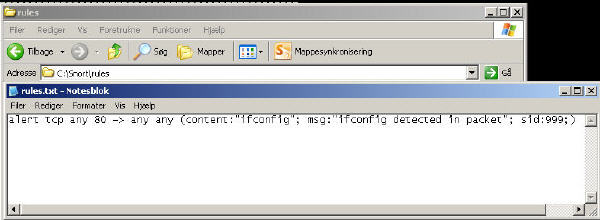
10. In the folder C:\Snort\rules create the file rules.txt
11. Open the file and type alert tcp any 80 -> any any (content:”ifconfig”; msg:”ifconfig detected in packet”; sid:999;)
12. Save and close the file
We will now try using this rule while sniffing traffic. The –k none argument, tells Snort not to ignore checksum error packets.
13. Type snort -dev -i 2 -l C:\Snort\log -K ascii -c C:\Snort\rules\rules.txt -k none
14. Visit the site ifconfig.dk and navigate around the site for a bit
15. Stop the capture by pressing Ctrl+C
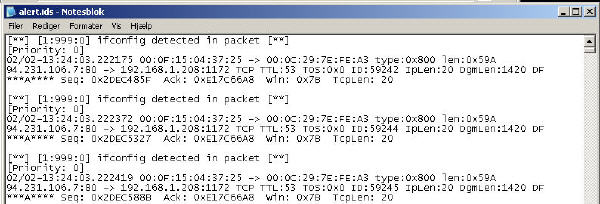
A file called alert.ids should now have been produced in the C:\Snort\log folder.
As said this is only the basics of what Snort can do. It can be configured to capture close to anything running though you Ethernet card. Also there are a lot of preconfigured rules and plugins which can help determine what kind of activity is happening on a network. An example would be to pick up on a Nmap scan of the network.


